Psiphon is a tool that gives you uncensored access to internet content. Currently Psiphon is available for Android, iOS and Windows. This post will take you through steps to get uncensored access to internet content on you Mac and Linux machines.
NOTE : You need an Android Device as we will be routing traffic from MAC and Linux machines to the Android device.
Download Psiphon App on your Android Device
Go to Play Store and install Psiphon app. If the app is banned in your country, then sideload the app. Here is the link for Psiphon apk.
Play Store Link : https://play.google.com/store/apps/details?id=com.psiphon3.subscription
Download SSHDroid App on your Android Device
Play Store Link : https://play.google.com/store/apps/details?id=berserker.android.apps.sshdroid
Both Android device and Mac/Linux machine should be on the same network (i.e both be connected to same LAN). In case you have mobile data available, then you can do USB tethering to access internet on Mac/Linux.
Test Psiphon app by opening censored content
Open Psiphon app and start VPN service (make sure to tunnel whole device when asked). Try opening the censored website, it should open now. (Opening torrent sites was the motivation behind this, I wanted to open 1337x torrent site)
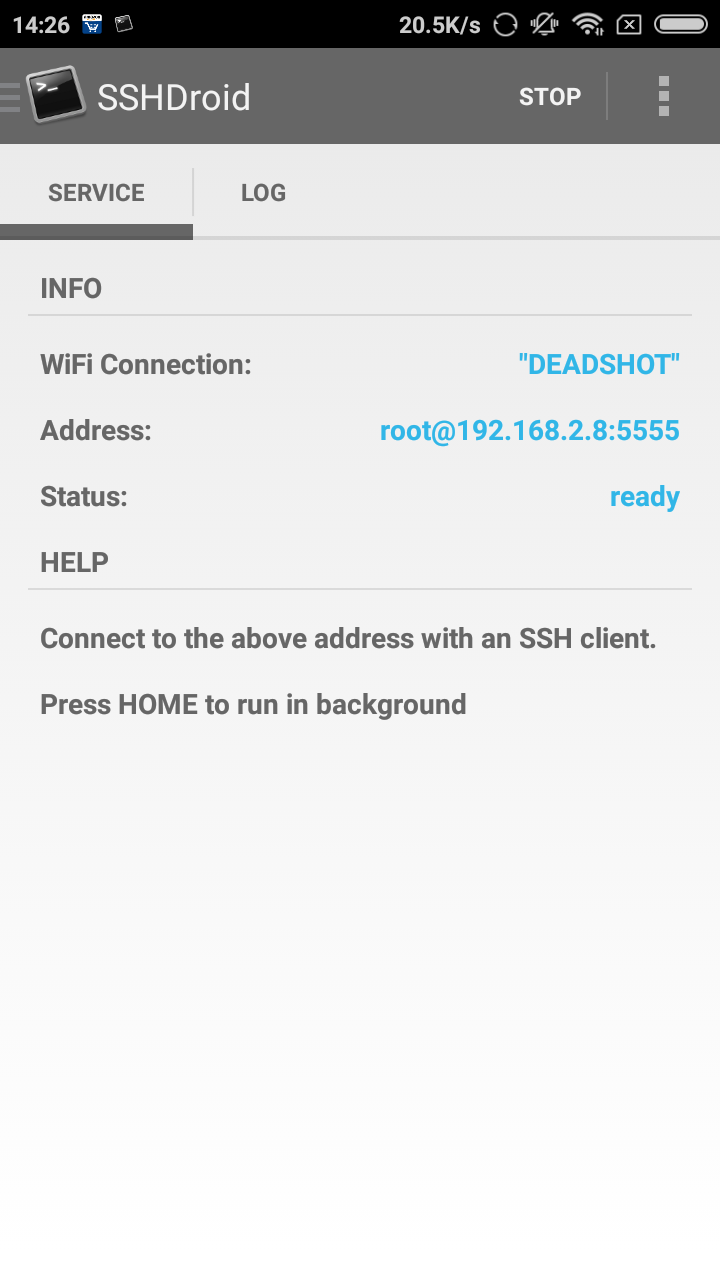
Open SSH Server on Android device using SSHDroid
Open SSHDroid app and click start. (If you are using mobile data, then uncheck Require WiFi option in SSHDroid Options). You should see something like the image below.
Setting up SSH Tunnel in Mac/Linux machine
ssh -D 8000 -f -C -q -N root@192.168.2.8 -p 5555
Execute above command in the terminal. Change root@192.168.2.8 with SSHDroid’s address in your case. Replace port 5555 with port specified in your SSHDroid’s address. You can change this port in Options of SSHDroid app.
Explanation of arguments
-D: Tells ssh that we want a SOCKS tunnel on the specified port number. In this case, I chose 8000. You can choose anything in between 1025-65536 (make sure its not in use)-f: Forks the process to the background. (i.e even if you close the terminal where you ran the command, ssh tunnel would not close, to close tunnel you need to kill the process by providing its PID)-C: Compresses the data before sending it-q: Uses quiet mode-N: Tells ssh that no command will be sent once tunnel is up
Verify the tunnel is up and working by this command
ps aux | grep ssh
This would output the tunnel process with details like process ID (PID), etc.
Now we need to set up proxy in Mac/Linux. There are two choices, you can configure proxy for specific browser like Firefox or system wide proxy. In case of configuring only Firefox browser, traffic from Firefox browser would be routed through Android device. And network traffic from any other source would be routed as usual and won’t allow uncensored content. In system wide proxy, all the network traffic would be routed through SSH tunnel.
Option 1: Configuring System Wide Proxy
Linux : Go to Settings -> Network -> Proxy. Select Manual Proxy and provide localhost in address and port 8000 in SOCKS proxy option. You might have supplied a different port to ssh tunnel, make sure to replace it with the port you used.
Mac : Go to System Preferences -> Network, select the network you are connected to (WiFi or USB tethered network). Then go to Advanced -> Proxies -> SOCKS proxy and provide localhost in address and port 8000 (or what you provided during tunnel creation).
Option 2: Configuring proxy in Firefox browser
Go to Preferences -> Network Settings, Select Manual Proxy Configurations and inside SOCKS Host, provide address (localhost) and port (8000 or what you provided while creating ssh tunnel).
That’s it, depending upon the way you configured the proxy, you should be able to surf internet un-restricted on your Mac/Linux machines.